Managing articles
Table of contents
Adding an article
If you create a website using our platform, you may want to create articles to embed in your website pages. Here are the steps to add an article:
- Navigate to your team dashboard.
- Access the “View articles” option located at the top right corner.

- Now click on the “+ Article” button, positioned in the top right.

- You can now add the content. Any article needs to have a title and some text.
- You can also use the + block inserter icon to incorporate additional elements such as images.

- If you want you can specify relevant categories using the “+ Add” button under the category section. Using these categories you will be able to filter articles by category on your website pages later on.
- If you are part of multiple teams, ensure the correct team is selected under the “Team” section for precise attribution.
- Press the “Add” button to save the article and to be redirected to the edit page.
If there already are articles that have categories, you can select an existing category and add an article that automatically has that category. To do this press the + button for the selected category. In the example below the “About” category was selected, and to create a new article with that category, the “+ About” button can be pressed.

Editing an article
Get on the Edit page
After creating an article, you are redirected to the edit page of that article.
You can also get to the edit page of an existing article by:
- Navigating to the articles list from your dashboard by pressing the “View articles” button located at the top right corner, and then selecting the edit option on an article card that you want to edit. The option is available from the three dots button.
- Selecting the edit option on an article title from the website.
These options are available only if you have rights to edit the article.
Fields on the Edit page
The Edit page has two sections:
the main edit section, where you edit the content of your article:

and the sidebar which allows you to edit some metadata of the article:
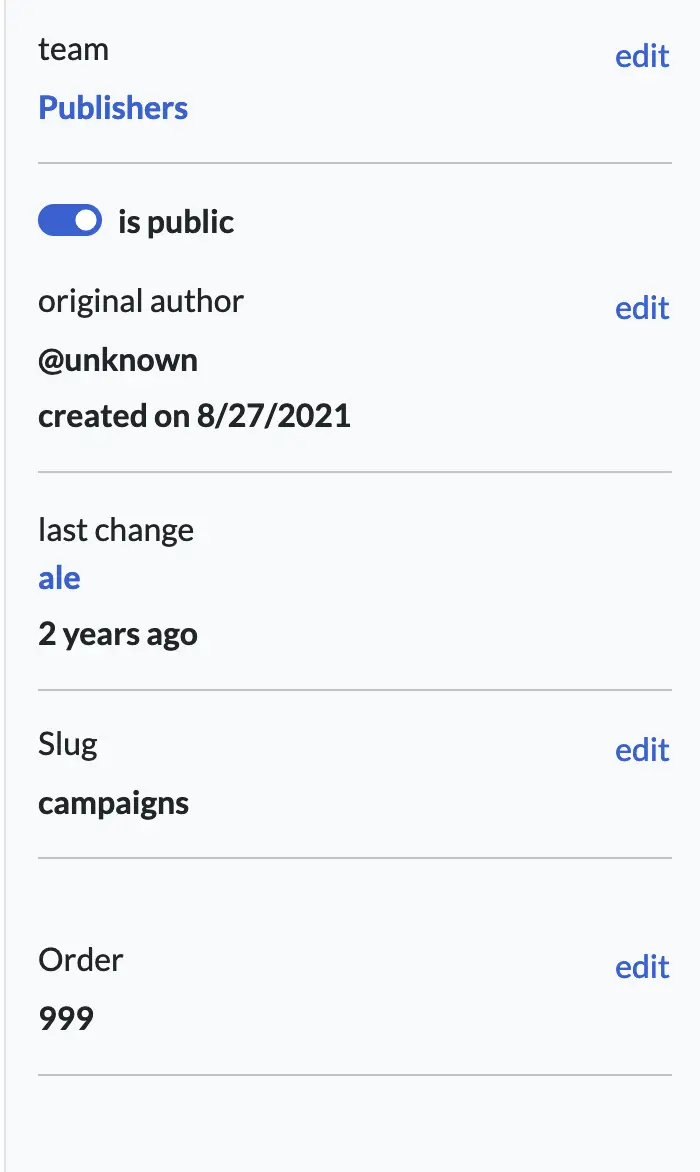
To edit a field from one section you need to press the edit button. In the main section it is represented by a pencil button  , and on the sidebar by an edit text
  . The only exception is for the cover (which is saved immediately after you selected a picture) and the main article (which is always editable and saved when the save button is pressed).
To help you to better understand what each field does, here is a list with their purpose:
- The main article is the article that will be shown on the website
- Categories are used to group articles. This is useful when you want to allow only a subset of your articles to be shown on a page.
- Release date is used when an article needs to be published on a certain date. We recommend using this, because it helps you and your users to understand how old is a page.
- Cover is the main picture that based on your website design, and will be shown on a card list on an article page.
- Photos represents is a list of pictures that can be shown on your article page.
- Team sets the team that owns the article.
- is public determines if the article can be seen by unauthenticated people or ones that are not part of the team.
- original author shows who created the article. The user shown on this field can edit the article if they are a member or a leader.
- slug is a unique id that is used instead of the id to reference the article.
- order is a numeric value that, based on how your website is configured, will determine its order in a list.
Deleting an article
Articles can be deleted only if you have edit rights to them. This means that you created them, or the articles belong to a team where you are an owner:
- Navigate to your team dashboard.
- Access the “View articles” option located at the top right corner.
- Press the three dots button on an article card to open the context menu:
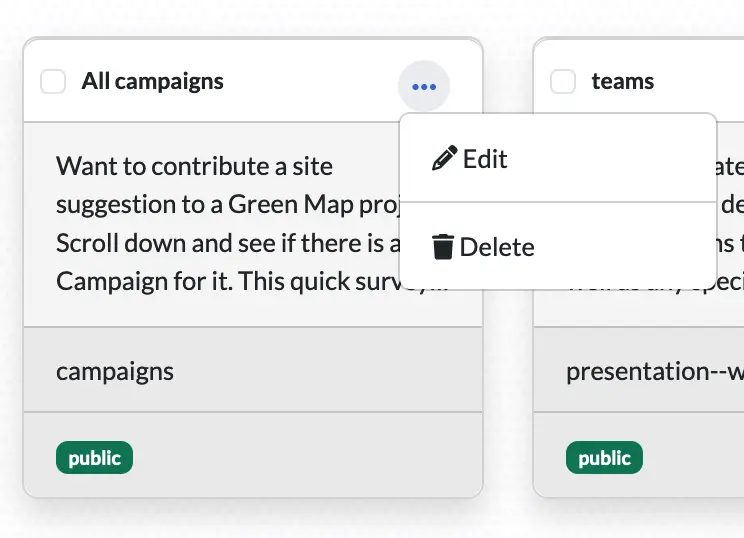
- Press the
deletebutton - You will be prompted to confirm the action:

- If you press
Yes, the article will be deleted. Note that you won’t be able to recover it later.