Managing maps
If you are just getting started, we recommend you read first our introductory guide.
Table of contents
Adding a map
To add a map to your team, follow these 3 simple steps:
- Click on the “+” button from the top menu and select
Map. - Fill in the name, a short description, and select the team that owns the map.
- Press the
Addbutton to create the new map an get redirected to the edit page.
Editing a map
After creating a map, you are redirected to the edit page of that map. You can also edit a map by:
- Navigating to the team dashboard, and then selecting the edit option on a map card that you want to edit.
- Selecting the edit option on a map or map card from the website.
These options are available only if you have rights to edit the map.
The Edit page has two sections:
- the main edit section, where you edit the content of your map:
- the sidebar which allows you to edit the metadata of the map:
To edit a field from one section you need to press the edit button. In the main section it is represented by a pencil button  , and on the sidebar by an edit text
  .
.
To help you to better understand what each field does, here is a list with explanations:
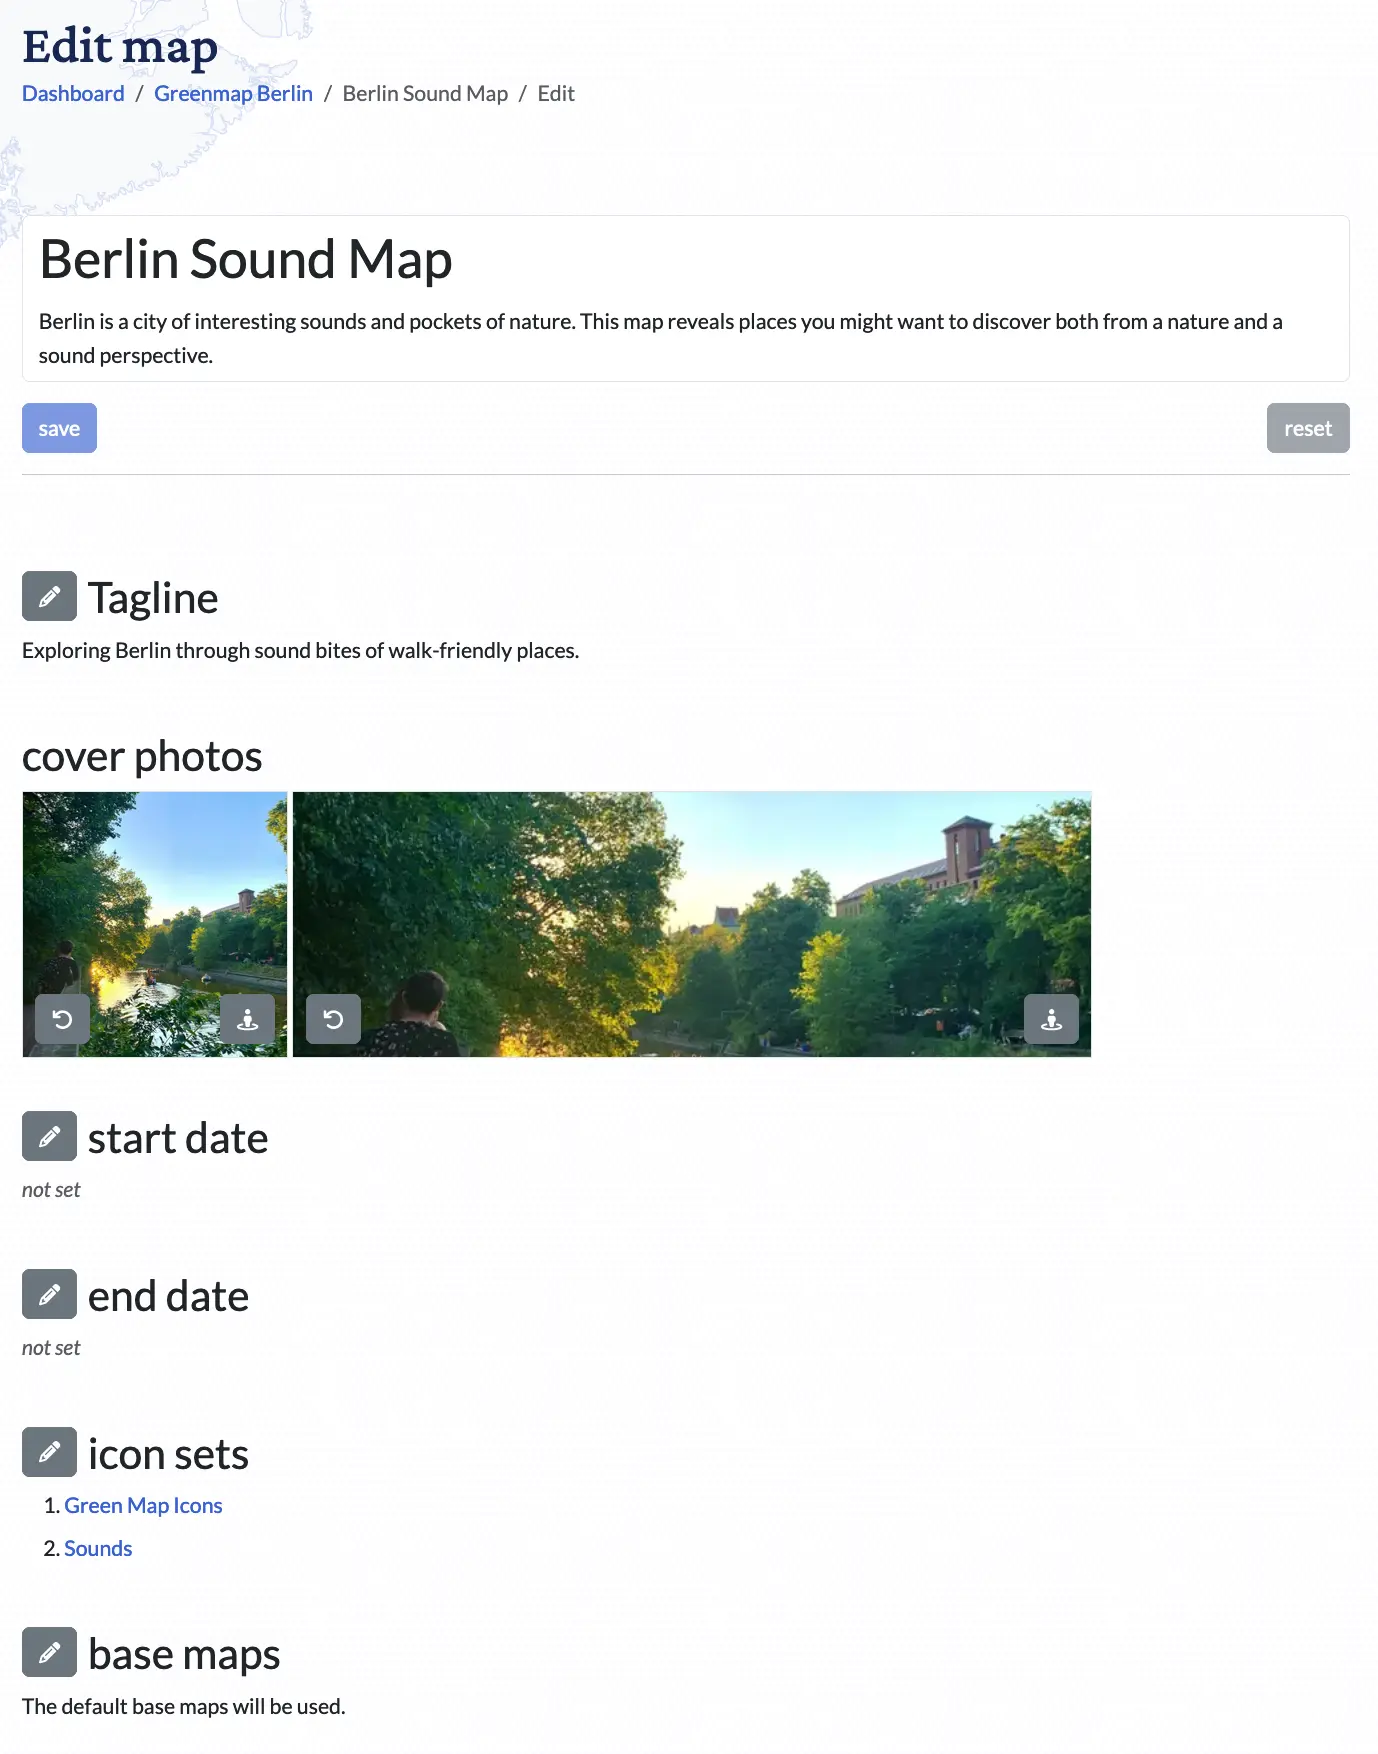
- The name and description contains the title and description of the map.
- cover photo is the picture that will be shown on map cards.
- icon sets are the icon sets that will be used on the map. When you create a new map, our default sets will be assigned to the map. If you want to use one of your icon sets, add it here.
- base maps are the geographical context and style of the map. Default base maps are added whenever you create a map. If you want to use additional base maps, you can set them here.
- mapping area defines the geographic area of your map. It sets the centerpoint and scale of the map’s initial view. By defining a mapping area you are creating the default map view for your map. Ideally you want it zoomed in at an appropriate level to show several sites, so your map’s users are encouraged to explore further.
- mask features allows you to protect sensitive location data. If your map contains sensitive data, but you still want to publish your sites on the map, you can show them in an imprecise location by enabling a mask. If you don’t select a map the last decimals of the features’ location will be masked. Otherwise the points will be assigned to the centroid of the matching polygons from the selected map.
- license is the license used on your map. You can describe here how everyone else should use your data. If you don’t know what your options are, you can start here: https://creativecommons.org/.
- embedded map is a read only text that can be pasted into other websites to render your map.
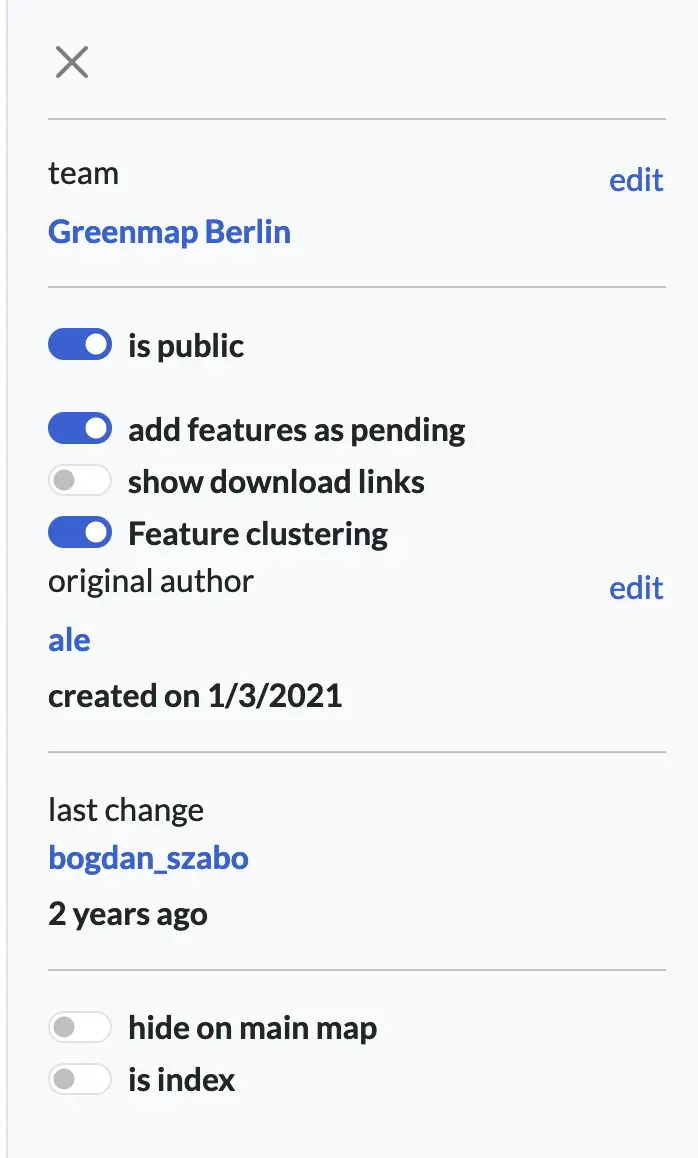
- Team sets the team that owns the map.
- is public determines if the map can be seen by unauthenticated users or ones that are not part of the team.
- add features as pending When this option is enabled, contributions to the map will be added using the pending visibility. Otherwise they will be added as private.
- show download links When this option is enabled, a download button will be shown on the map, which will allow others to download the map data in different formats.
- Feature clustering By default, when points on a map are very dense, we will create clusters which are usually rendered as hexagons. If you want to hide those clusters disable this options. As a side effect, when features overlap, only one will be rendered. We recommend leaving features clustering on for a faster load time of your map data. Zooming in on the map will show individual map features even if clustering is on.
- original author shows who created the map. The user shown on this field can edit the map if they are a member or a leader within the team.
- hide on main map is an option available only to the administrators, and gives them the ability to hide the map features on the main map view.
- is index is an option available only to administrators, and sets the map as a search index. This will cause the features on this map to be used by our geocoding algorithm.
Deleting a map
A map can be deleted only if you have edit rights to it. This means that you have owner rights in the team. To delete a map:
- Navigate to your team dashboard.
- Press the three dots button on a map card to open the context menu:

- Press the
deletebutton - You will be prompted to confirm the action:

- If you press
Yes, the map will be deleted. Note that you won’t be able to recover it later.
Exporting map data
GISCollective is designed to allow you to export the sites data of your map in various formats. This enables you, for example, to make bulk edits and import the data again. For users who are logged in, there are 3 options of data formats you can choose from: CSV, GeoJson, and GeoPackage. The export file contains all data, public and private, to which the user has access. For visitors who are not logged in, only 2 options are available, CSV and GeoJson. The export file will contain only public sites, lines and polygons.
In order to export a map’s data, you can use the download button on the Map View page, or the one on the Browse page of the map. Here’s how:
- Go to
Browsein the menu and find your map, then click on the map’s name. This will take you to the Map View, where on the lower left corner you have the download button, as shown below.

Note that this flow is also available for site visitors who are not logged in. However, they will only be able to download the public data, so any sites or features that are private will not be included in the exported file.
- Or, if logged in, you can also go to
Browseand find your map, then click on the 3 dots menu next to the map name and chooseView features. This will take you to the map’s Browse page where you have a download button next to the map name.
