Get started with mapping
After creating an account and team, you are ready to set up your map! Here is an overview and a few tips to help you get started with confidence.
Table of contents
Create Your First Map
Once a team is in place, it’s time to create a map. The map will contain features that comprise the project data: points (sites), lines (routes) and polygons (areas). Make sure you are logged in and start by pressing on + > Map:

When setting up a map, the first step is to name it, provide a description, and associate it to your team. Then you will get to the map’s Edit page, where a wide array of configurations are available. It’s not required to use all of them, here are the most important ones:
The Cover Photo
This image will be used as a map card when a list of maps is displayed. Upload a square photo, or one that will look nice when cropped to a square.
See ‘Your Content’ before adding to this Platform - your content is your responsibility.
This image appears as a map card or thumbnail when a list of maps is displayed. Upload a square photo or a graphic with text (such as the map name or the mapmaker organization). This image can be used on a Survey and for project promotion on social media, etc. Tip: Use free tools such as Canva, Google Slides or PhotoScapeX to compose your map images.
Icon Sets
Each feature - whether it be a point, line, or polygon - is visible on the map with its primary icon. The available icons come from the map, so choose an existing icon set for the map, or create one if you want to use your own icons.
Initially, your map will have the default Green Map icons sets selected. You can click on the pen button, then enable to remove some icon sets or add your own.
![]()
Once you selected the desired set or sets, click on Save. In case you want to create your own icon set, find more info about that in our Icon Design Guide.
The Mapping Area
The mapping area defines the geographic area of your map. It sets the centerpoint and scale of the map’s initial view. By defining a mapping area you are creating the default map view for your map. Ideally you want it zoomed in at an appropriate level to show several sites, so your map’s users are encouraged to explore further.
Setting the mapping area does not draw a border on the map, but centers that area, regardless if viewed on the desktop or a mobile device. It is also used to show which maps are available when people propose a site.
To set a mapping area:
- First click on the pen button in the mapping area section
- Zoom in on the map, and move around to find the right location. You can move on the map by pressing on the mouse button and dragging while the mouse button is pressed.
- Once you are over the right map area, position the blue dot where you want to start drawing a rectangle and click there(press and release the mouse button).
- Now drag to make a rectangle of the right shape and size, then click again to confirm.
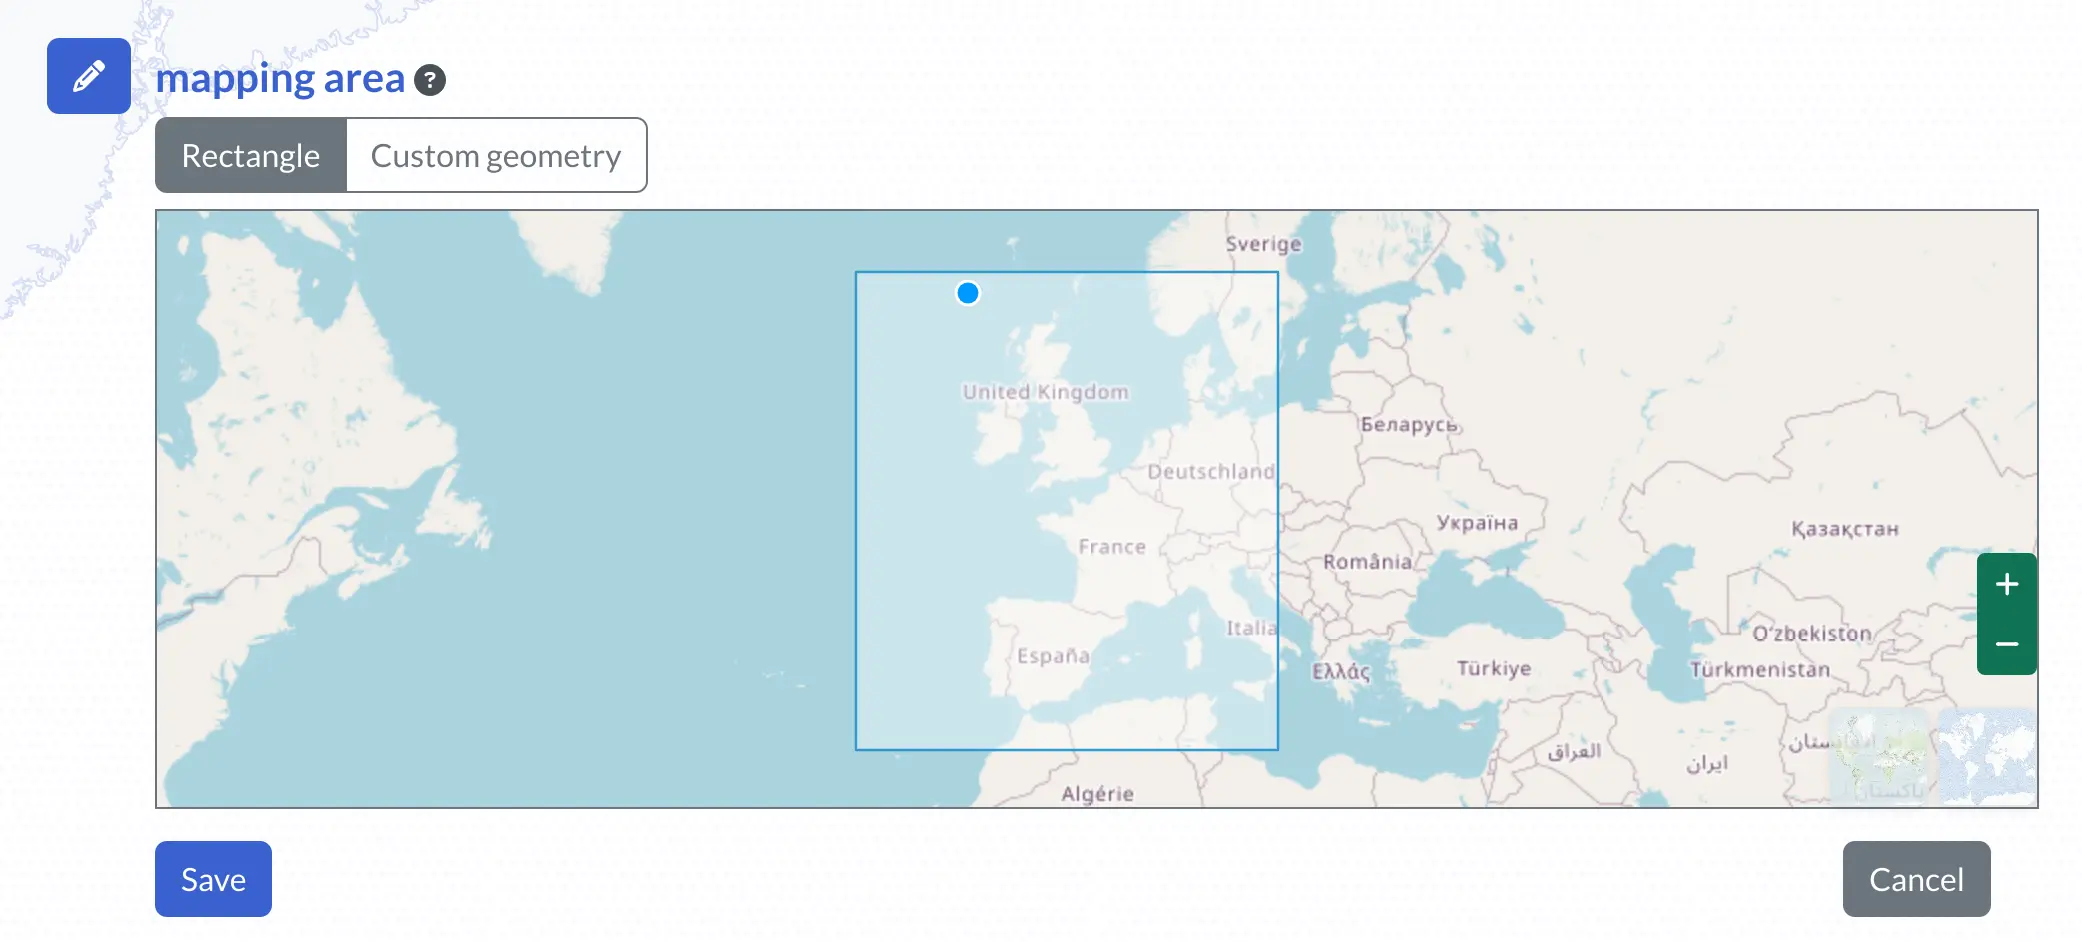
If you would like to redraw the area, simply start again from step 1.
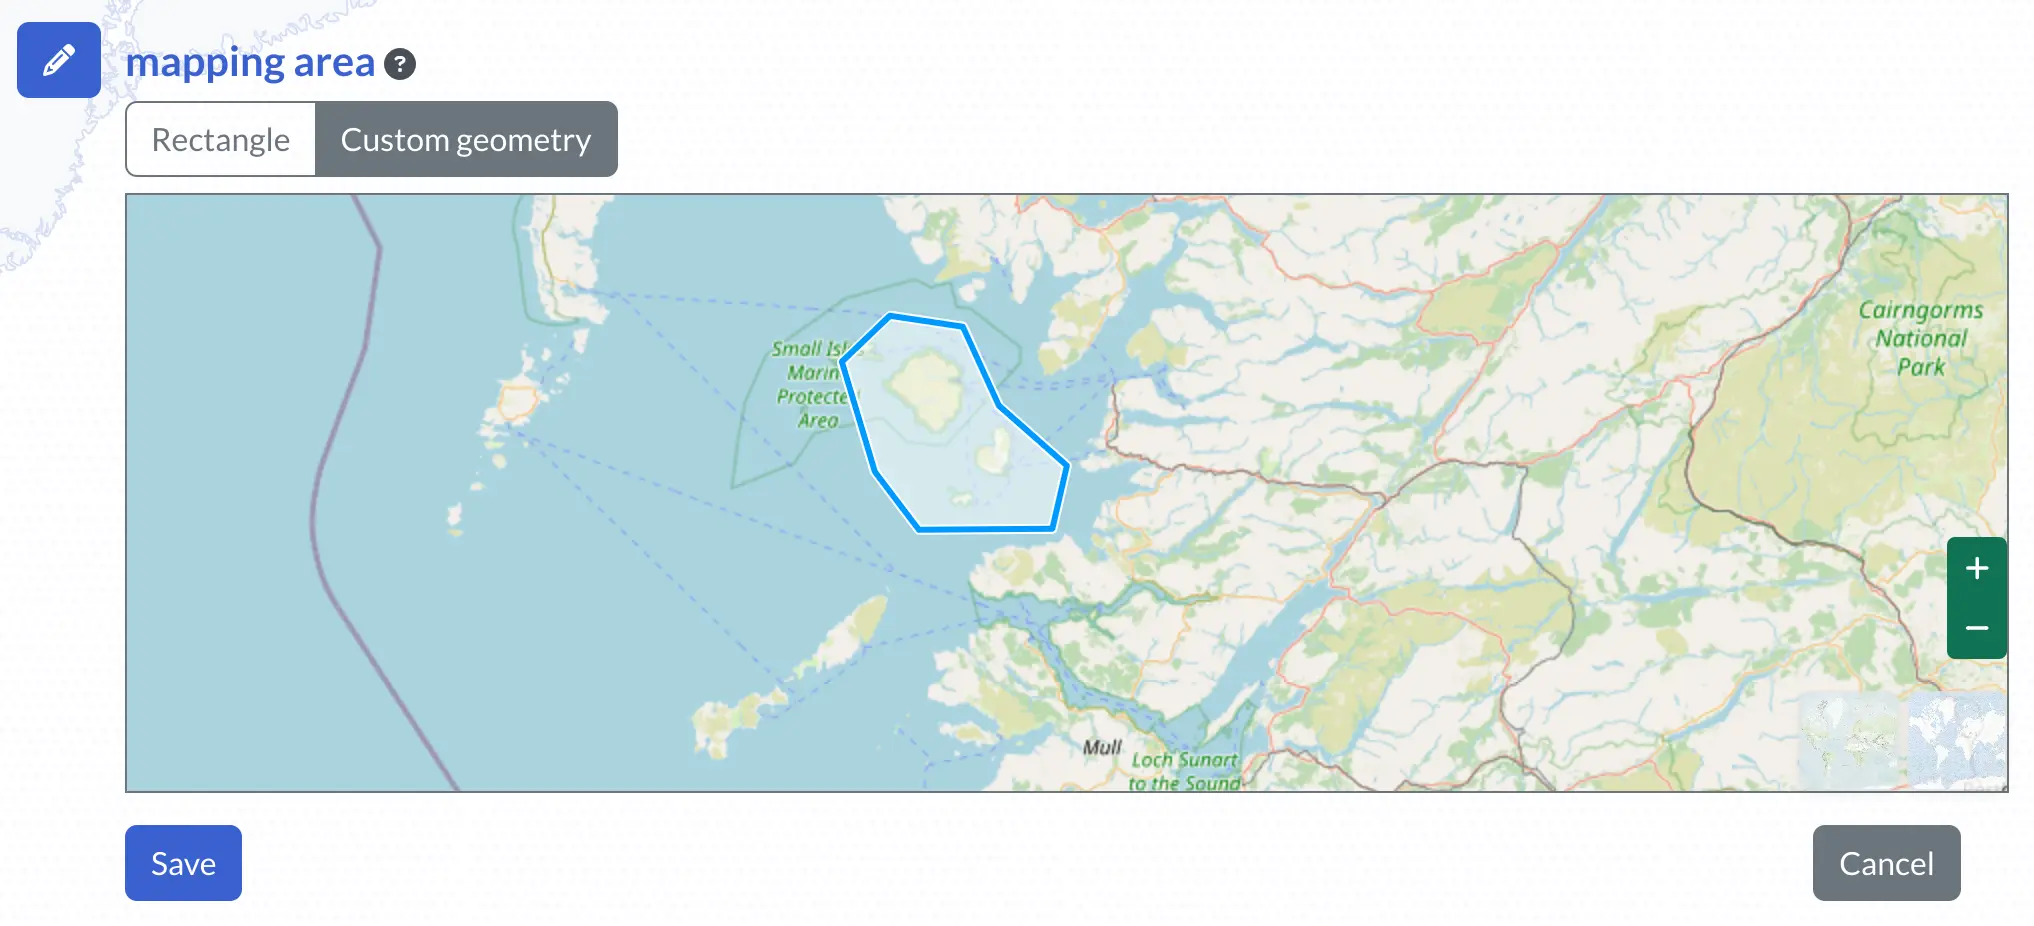
Before you save, if you’d like the mapping area to be a more precise area, press on Custom Geometry, then click in the rectangle to select it. You can now place the blue dot anywhere on the rectangle border, and press and drag to adjust the border shape as you wish. Then Save.
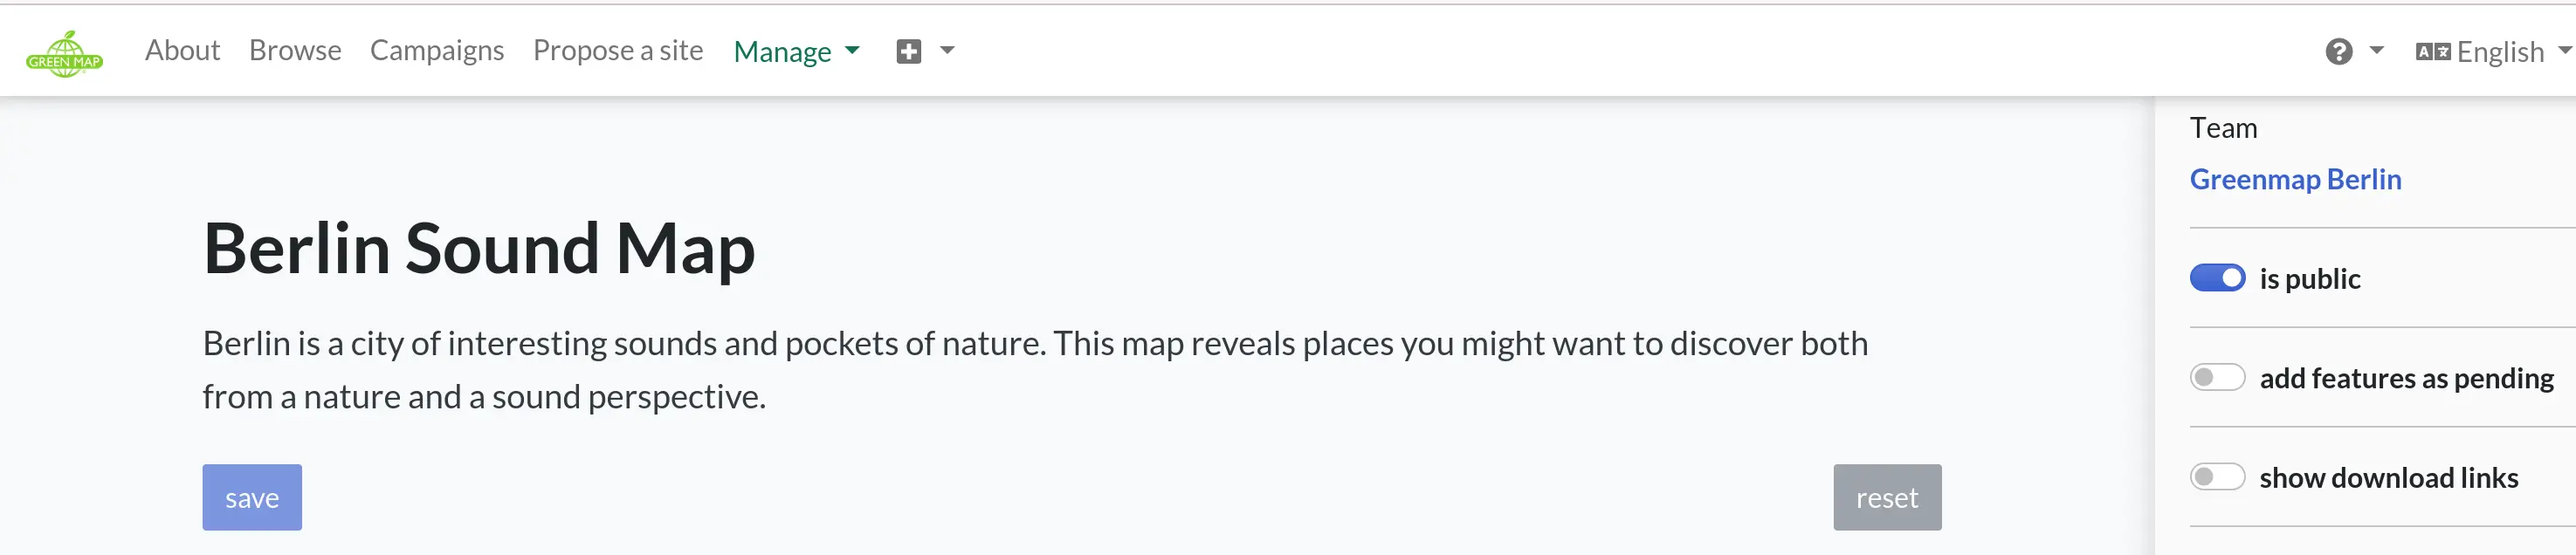
The “is public” Toggle
As long as it is private, only team members will have access to the map and its data. You will want to make the map public when it’s ready, or if your project includes public participation.
At this point, getting the word out about the map is important to plan. Some projects celebrate with a launch event, post on social media, and embed their map on their own website!
Contribute to the Map
Once you have the map, team members and the public at large can start contributing features and making use of the data. The Green Map platform offers many options for engaging people in the mapmaking process:
- By setting up one or more Surveys for your map, you can effectively crowdsource data gathering, even onsite, while you are in the field. The responsibilities of ‘Your Content’ extend to these crowd-sourced images and site descriptions.
- As the mapmaker, you can also add data to your map from + > Feature in the menu. This may be the quickest way to add individual features as a mapmaker, because after filling in the basic information (name, map and location) you go straight to the edit page of the feature, where you can also publish it.
- Using the import functionality you can add gpx, geojson, json and CSV data already collected.
Your Content
Take care when you and your team are selecting images and other content to share on this Platform. As described in the Terms of Service, you are responsible for the contents of your map.
In this digital era, there are trolling companies that make their money finding infringements of copyright. So, while it’s easy for you to use existing images, this can open the door to copyright fines and prohibitions that could result in your map being taken offline. Here are some tips for choosing and reviewing your content:
- The use of original images, text and sound is best.
- Avoid uploading copyrighted images unless you hold the copyright or have permission. It’s become common to use a release form such as this example; your country or institution may have specific release terms.
- If permission has been obtained (or the image is licensed under a Free license), be sure to credit the creator as specified.
- If images are not from a “copyright-free” source, whether obvious or not, it is likely that you will be notified of the violation and potentially fined.
- If you use licensed images, carefully review the license applied, even if it is a Free license. It may require that you credit the work, or have some other conditions. Here is an example of a free license.
- The only acceptable use of a copyrighted image is if you have first obtained permission. However, older images (1920s or earlier) may have an expired copyright, but this varies from country to country - please confirm locally.
- There are services that offer images, like Unsplash - search for others. Make sure you filter by Free license pictures.
To add a credit to a photo, first, upload the photo. Save. Click to edit again, then click the pencil to add text on the right sidebar. You can include links in the Attributes field. Click Save under the photo. Map users must click the image to see the credit.

Options:
You can add the credit for your image (and the Map Cover Photo) to the description field if desired.
Some mapmakers have added the credit to the photo using free editing tools. A screenshot is a quick way to put text and images together.
Similar thoughtfulness goes into writing descriptions. Add a credit when you quote someone or duplicate text to describe a place, area or route you have mapped. This extends to the description of the map - original text is best. The Map Description is a great place to credit your map team, organization or school and other project supporters.
You may be adding sound files to featured sites - if they are not your original sounds, they may have specific permissions or credits.
Data files you add to your map may also have specific permissions or credits. Meta data (data about the data) can include date and project information that helps set the context for the data over time.